Google Chrome is the most popular web browser. It's convenient, it works quickly. The simple interface is complemented by great features. The browser has many settings that can be enabled or disabled for your needs. One of these functions is autocomplete. Its use frees from the need to store passwords, logins from different sites. Using AutoComplete speeds up the authentication process. If this feature is enabled, Google Chrome will remember the entered passwords, logins and, substitute saved data.
What is the autocomplete function in Google Chrome for?
Autocomplete in Google Chrome allows authorization data. With its help, each time you visit the site for which you have saved your login and password, they will be entered automatically.
The autocomplete function is convenient for those who often visit sites that require authorization. Especially if there are a lot of these sites.
At the first authorization – when you have just registered on the site and log in there for the first time under your login and password – Chrome will ask you: should I save this data? If you agree, then with each next visit to the site, you will be automatically logged in – you will not even have to click the "Sign in" button. If you press the cross, then on the next approach Chrome will again ask: to save or not? If you click "No", then Chrome will not save anything and will not ask again.

Pros and cons of autocomplete
Obvious advantages:
- time saving – no need to enter the password and login every time when visiting the same site;
- energy saving – no need to keep passwords in mind and recover them if you forgot;
- When syncing is turned on, you can use saved passwords on another device.
- saved passwords can be exported to a separate file or transferred to another browser.
Synchronization and export can be useful in order not to lose passwords when reinstalling the system or browser.
A big plus is the ability to check saved passwords for data leakage.
You can't do that with the unsaved. To verify passwords:
- open chrome://settings/passwords
- click "Check passwords";
- passwords will be lined up in two lists: "Disclosed passwords" and "Simple passwords".
The exposed ones are the ones that have leaked into the network, and the simple ones are the ones that are easy to pick up. It is desirable to change both of them quickly.
The minus of autocomplete is only one, and even that, rather, is far-fetched. That someone with access to your computer will open a browser, look at your passwords there or go to the site under your login. This problem is solved by using multiple accounts. If you share a computer with your household, you can create separate Windows accounts for each user and different Google accounts to log in to Chrome.
What data can be saved in the browser
What autocomplete data Chrome can remember:
- logins and passwords;
- payment methods;
- phone numbers;
- e-mail addresses;
- delivery addresses.
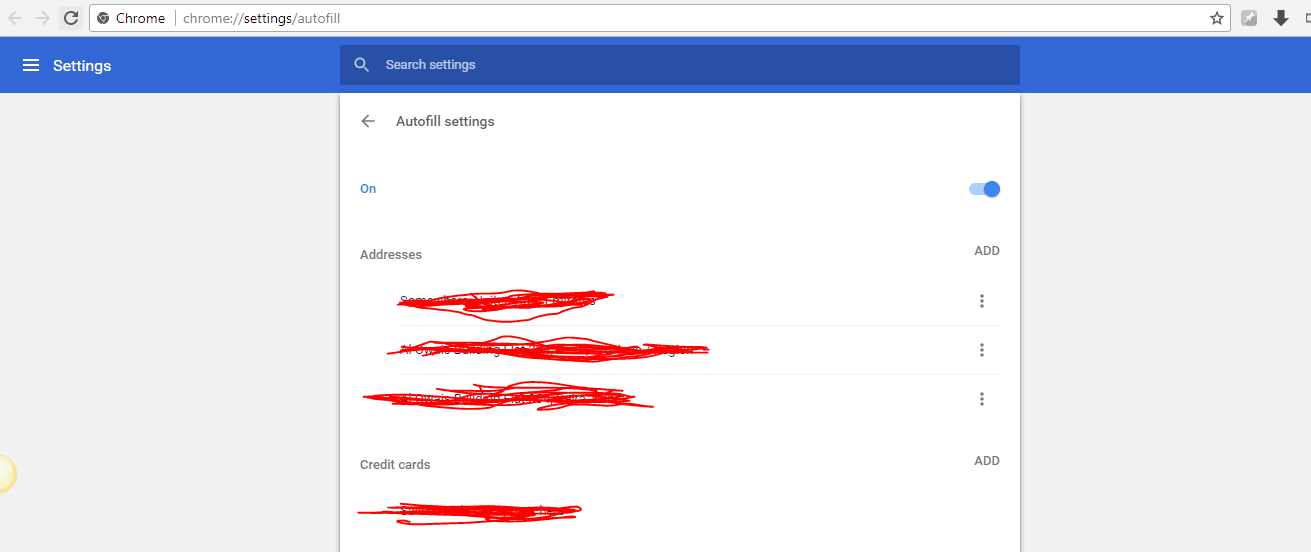
All this data is displayed in the "AutoComplete" section – chrome://settings/autofill
There you can also set prohibitions and permissions for each category of data. For example, allow passwords to be saved, but prevent credit card information from being saved.

Turn on AutoComplete
Usually this feature is activated by default, but you can also enable it manually:
- click three dots in the corner of the browser;
- go to "Settings";
- go to "AutoComplete".
First, click on "Passwords". Let's see if the options "Offer to save passwords" and "Automatic login" are activated. Then scroll down and look at "Sites whose passwords are not saved." If there is a site in it for which you want to save the password, then remove it from the list by clicking on the cross.
Then exit the "Passwords" and go to the "Payment Methods", where we check whether the toggle switches "Save and automatically substitute payment data" and "Allow sites to check the availability of saved payment methods" are turned on.
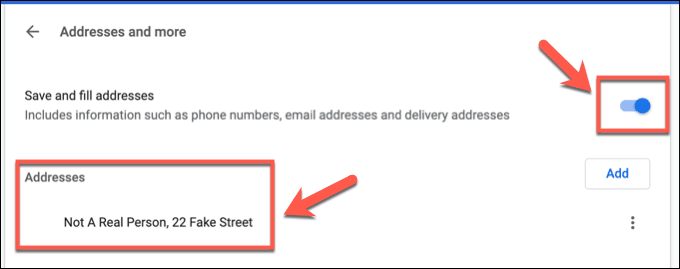
Then go to "Addresses and other data" and look at the "Save and automatically substitute addresses" switch.
Adding data
You can add addresses and payment methods manually. To do this, in the relevant sections (see above) there is an "Add" button.
How to disable the feature
How to remove autocomplete in Google Chrome completely:
- Go to the "AutoComplete" section – chrome://settings/autofill
- From there, alternately go to "Passwords", "Payment methods", "Addresses and other data";
- And turn off all the toggle switches there.
If you want to disable autocomplete for a specific site, but just click "No" when Chrome asks if you want to save the data.
Once you receive the answer "No", Chrome no longer asks about saving, and the site is included in the list of "Sites for which passwords are not saved."

Delete AutoComplete data
There are two ways:
- Delete everything.
- delete selectively.
Let's look at both of them in more detail.
Complete removal
To delete autocomplete data completely:
- press Ctrl + H;
- click "Clear History";
- in the "Advanced" tab, check the box "Passwords and other login data";
- click "Delete Data".
For greater reliability, the period is selected "For all time", and it is desirable to put all the other ticks as well.
Selective data uninstallation
If you want to delete some of the information, you need to open the browser, go to the settings and open the "AutoComplete" section.
There are a few items there: passwords, addresses, and payment methods. Each item stores the relevant information. Opposite each saved line there are three points – click on them and select "Delete".

Secure use of auto-fill
It is not recommended to save data for authorization in banks and payment systems.
Periodically perform a security check:
- go to "Settings – chrome://settings
- scroll down a bit to "Security Check";
- Click the "Check" button and fix the vulnerabilities if any.
If other people have access to your computer, use different operating system and Chrome accounts.


